creativepartyblog
รีวิวสินค้าไอที รีวิวแกดเจ็ต สินค้าไอที และ อุปกรณ์เสริม ล่าสุดและสินค้าไอทีที่จะมาพูดถึงในวันนี้ดีอย่างไร?
รีวิวสินค้าไอที สำหรับยุคปัจจุบัน ที่มีการใช้เทคโนโลยี มาเพื่อพัฒนาสิ่งต่าง ๆ เยอะแยะมากมาย เลยทำให้ปัจจุบันนี้ สิ่งที่เกิดขึ้น มีอยู่เยอะมาก ที่ทำให้เรา ได้ใช้สิ่งของเทคโนโลยี ที่ทันสมัย ตามยุคปัจจุบันนี้ รีวิวแกดเจ็ต สินค้าไอที สำหรับสิ่งนี้ถ้าใครได้ใช้มัน มันจะเป็น
สิ้งที่สามารถ ช่วยให้ท่านนั้น สะดวกสบายมากยิ่งขึ้น ปัจจุบันเลยมี/ สิ่งประดิษฐ์ และรวมถึง วิวัฒนาการ ของเทคโนโลยี ออกมามากมายเลยก็ว่าได้ สำหรับสิ่งนี้ เลยเป็นจุด ที่ทำให้มนุษย์เราได้นั้น รีวิวแกดเจ็ต สินค้าไอที ได้มีสิ่งของไฮเทค ไม่ว่าจะเป็นอุปกรณ์
ที่ใช้ในชีวิตประจำวัน ของเรา เช่น Smartwatch Smartphone และรวมถึง Gadget ยอดฮิต อุปกรณ์เหล่านี้ เลยมีคุณสมบัติ ที่ตอบโจทย์ สำหรับผู้ใช้อย่างมาก ในตอนนี้ วันนี้เว็๋บของเรา รีวิวแกดเจ็ต สินค้าไอที มานำเสนอ สิ่งดี ๆ ที่เป็นสาระสำคัญ ให้แก่ทุก ๆ
คนได้รับทราบเกี่ยวกับ ความทันสมัยในตอนนี้ ของยุคปัจจุบัน ที่ท่านนั่้น ต้องทราบเพราะ สิ่งเหล่านี้มันอาจ เป็นตัวช่วยให้ท่าน นั้นจะได้รับสิ่ง ที่ประทับใจ อย่างแน่นอน สำหรับสิ่งนี้เรา creativepartyblog.com อยากนำเสนอ สิ่งประดิษฐ์สำหรับยุค 4.0
ให้แก่ทุกคน ได้รู้จักกัน เรามารู้จัก อุปกรณ์เทค โนโลยีทันสมัย กันว่ามีสิ่งไหนบ้าง ที่น่าสนใจ และน่าจับตามอง แล้วเลือกมัน มาใช้กับเรา กับอุปกรณ์ไฮเทค 2022 ได้รับความนิยมในตอนนี้ creativepartyblog.com รีวิวแกดเจ็ต สินค้าไอที
รีวิวสินค้าไอที รีวิวสินค้าไอทีใหม่ เทคโนโลยีเกจเจต แอปพลิเคชั่น
1.Xiaomi Smart Glasses สำหรับนวัตกรรมใหม่ ของทางค่าย Xiaomi ที่เป็นสิ่งประดิษฐ์ ที่น่าสนใจอย่างมากในตอนนี้ อุปกรณ์ที่เป็นสิ่งสวมใส่ ที่บริเวณดวงตาของเรา ซึ่งมันคือสิ่ง ที่เป็นอัจริยะ มันคือแว่นตา รีวิวสินค้าไอทีใหม่ เทคโนโลยีเกจเจต อันแรกของทางบริษัท Xiami
ที่ใช้ชื่อรุ่นว่า Xiaomi Smart Glasses สำหรับอุปกรณ์นี้ มันอาจมันช่วย ทำให้ท่าน ไม่ว่าเดินทางไปไหน หรือสถานที่ไหน ๆ ใส่แว่นตาอันนี้ ท่านก็จะไม่ต้องกลัว ที่จะเดินทางเวลา ที่ท่านเดินทางไปไหน รีวิวสินค้าไอทีใหม่ เทคโนโลยีเกจเจต เพราะมันสามารถ จะบอกสถานที่เหล่านั้น creativepartyblogรีวิวสินค้าไอที
ในเรื่องของเส้นทาง และรวมถึง การตอบรับข้อความ แบบเรียลไทม์ นวัตกรรมสิ่งประดิษฐ์ ของทาง Xiomi ที่ได้ผลิตสิ่งนี้ที่เรียกว่า Smart Glass ออกมาน้ำหนักของมัน เพียงแค่ 51 กรัม ถ่ายรูปด้วย เทคโนโลยี รูปแบบใหม่ ที่เรียกว่า waveguide
ก็เป็นระบบ MicroLED มันทำหน้าที่ ในการแสดงสิ่งต่าง ๆ อย่างเช่นข้อความ และการแจ้งเตือนต่าง ๆ บนโทรศัพท์ สมาร์ทโฟนของท่าน โดยการบอก ออกมา บนแว่นตาตัวนี้ และยังรวมถึง รีวิวสินค้าไอทีใหม่ เทคโนโลยีเกจเจต การแสดงข้อความ ถึงการโทรเข้า โทรออกของท่าน
บนหน้าจอของแว่น ตัวนี้เป็นเทคโนโลยี ที่ใช้ระบบ ( AR ) ถ่ายภาพ และแสดงข้อความต่าง ๆ บริเวณหน้าคุณ ถือว่าเป็น เทคโนโลยีสมัยใหม่ สื่อข่าวต่าง ๆ creativepartyblog.com ได้ออกมาพูดว่า อาจจะมีสิทธิ์ นำสินค้าตัวนี้ออกมา วางจำหน่าย ในประเทศจีน เป็นประเทศแรก และยังพูดถึงเจ้าสินค้าตัวนี้กันว่า อาจจะเป็นการแข่งขัน กับทางเฟซบุ๊ค ได้มีการเปิดตัว Rayban ออกมาในเมื่อไม่นานมานี้ creativepartyblog รีวิวสินค้าไอทีใหม่ เทคโนโลยีเกจเจต สินค้าไอทีมาใหม่ รีวิวสินค้าไอทีรีวิวแกดเจ็ตรวมข่าวไอที
รีวิวสินค้าไอที รวมข่าวไอที ข่าวรีวิวสินค้าไอที และข่าวที่จะมาพูดถึง ในวันนี้เป็นอย่างไร?
2.PuriCare Mask สำหรับผลิตภัณฑ์ ของทางแบรนด์ LG ผลิตหน้ากาก ฟอกอากาศ แห่งยุคสมัยใหม่ ออกมา ซึ่งทำหน้าที่ เป็นเครื่องฟอกอากาศ ให้กับท่านในตัว ซึ่งสำหรับ PuriCare Mask creativepartyblog รู้จักนวัตกรรม รวมข่าวไอที ข่าวรีวิวสินค้าไอที ล่าสุด ของทางแบรนด์ LG ที่ได้นำเสนอสิ่งนี้
ออกมาสู่สายตาผู้คน หน้ากากไฮเทค รูปแบบใหม่ ที่สามารถ กรองอากาศ และสิ่งที่ไม่พึงประสงค์ ให้แก่ท่านได้ หน้ากาก อเนกประสงค์ หรือชื่อเต็ม ๆ ของมัน PuriCare Wearable Air Purifier มันคือหน้ากาก กรองอากาศ แบบสวมใส่ สำหรับเจ้าสิ่งนี้
รีวิวGadget เปิดตัวสินค้า IT เทคโนโลยีอัปเดต creativepartyblogรีวิวสินค้าไอที
มันถูกปรับปรุง ในเรื่องของ Beta เพื่อแก้ไขปัญหาต่างๆ และมอเตอร์ที่มีขนาด เล็กกว่า และยังแถมเบากว่า อีกด้วย ซึ่งมีประสิทธิภาพ ในเรื่องขอ งการใช้งาน ที่มากขึ้น ทางค่าย LG ได้ออกมาพูด ถึงสิ่งนี้ และออกแถลงข่าว รวมข่าวไอที ข่าวรีวิวสินค้าไอที ถึงเรื่องหน้ากาก
ตัวล่าสุดของทาง รวมข่าวไอที ข่าวรีวิวสินค้าไอที แบรนด์ที่ได้คิดค้น ขึ้นมาให้สามารถ สวมใส่ได้ตลอดเวลา มันสามารถ กรองอากาศต่าง ๆ ที่เป็นอากาศเสีย ให้แก่ท่าน สามารถใช้งานมัน ตลอดทั้งวันได้ ด้วยกำลังแบตเตอรี่ ที่มากถึง 1000 mAh สินค้าไอทีมาใหม่ รีวิวสินค้าไอทีรีวิวแกดเจ็ตรวมข่าวไอที
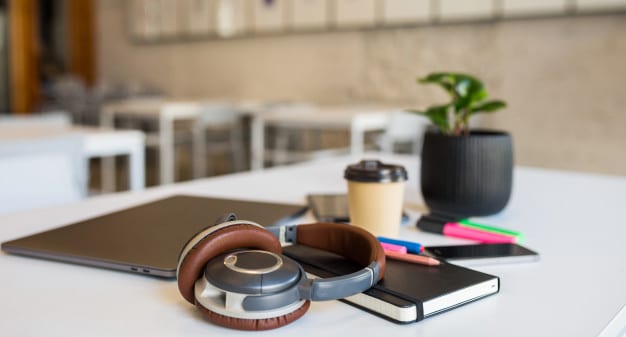
อุปกรณ์ไอทีที่มาแนะนำในวันนี้ คุณจะต้องชอบอย่างแน่นอน
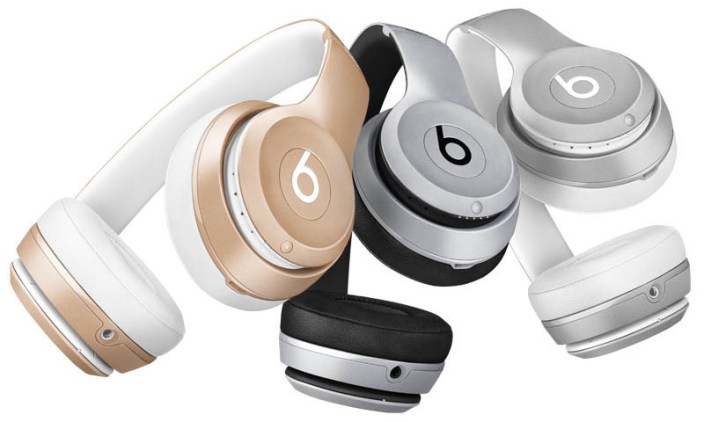
3.Wireless Charger สำหรับการ ชาร์จแบตเตอรี่ อุปกรณ์ต่าง ๆ ของท่านไม่ว่า จะเป็นโทรศัพท์ หรือนาฬิกา สมาร์ทวอช หรือ airpod อุปกรณ์ที่จำเป็นสำหรับ ผู้ที่ต้องเดินทางออกไป ข้างนอกอยู่ เสมอเลยทำให้ เราต้องมีเจ้าสิ่งนี้ ไว้ที่บ้านของท่าน creativepartyblog รวมข่าวไอที ข่าวรีวิวสินค้าไอที
หรือที่ทำงาน มันอาจจะช่วย ให้ท่านสามารถ ชาร์จอุปกรณ์ไฮเทค ของท่านได้นั้นเอง โดยสิ่งนี้มันสามารถชาร์จ อุปกรณ์ของท่าน พร้อมกันได้ถึง 3 อย่างนั้น ก็คือ Smartwatch , Smartphone , airpod พร้อมกันได้ เลยนั้นเอง ดีอย่าเลยใคร เลยสำหรับ อุปกรณ์ไฮเทคยุค 2022 สำหรับเจ้าสิ่งนี้ creativepartyblogรีวิวสินค้าไอที สินค้าไอทีมาใหม่ รีวิวสินค้าไอทีรีวิวแกดเจ็ตรวมข่าวไอที
คาสิโนยูฟ่าเบท ช่องทางการเข้าใช้งาน คาสิโนออนไลน์ ที่ได้รับความนิยมจากผู้ใช้งาน เป็นอย่างมากที่สุดคาสิโนยูฟ่าเบท อีกหนึ่งช่องทาง การให้บริการผ่านทางระบบ เว็บพนันออนไลน์ อีกหนึ่งทางเลือกสำหรับการลงทุน ที่ได้รับความสนใจ เป็นอย่างมากอีกด้วย ด้วยระบบ พนันออนไลน์ ที่ทันสมัยที่เป็นอีกหนึ่งตัวเลือก ที่ได้รับความนิยม จากผู้เล่นทั้งหลาย เป็นอย่างมากอีกด้วย โดยที่เป็นช่องทาง อีกหนึ่งทางเลือก ที่น่าสนใจที่เหล่า นักพนันทั้งหลายนั้น ก็สามารถเข้าถึง การลงทุนได้อย่างง่าย และสะดวกสบาย เป็นอย่างมากที่สุด
โดยที่รูปแบบการเข้าใช้งาน คาสิโนออนไลน์ ท่านเองก็สามารถเข้าถึง การลงทุนได้ง่าย มากกว่ารูปแบบการให้บริการ ตามบ่อนพนันทั่วไป โดยที่ท่านเองนั้น ก็จะต้องเสียเวลา และเสียค่าใช้จ่าย ไว้สำหรับเป็นค่าที่พัก หรือว่าจะเป็นค่าเดินทาง ค่ากินต่าง ๆ ที่ถือว่าเป็นต้นทุน อีกอย่างหนึ่งนั่นเอง โดยสำหรับช่องทาง การเข้าใช้บริการ คาสิโนยูฟ่าเบท ที่เป็นช่องทาง การเข้าใช้งาน ผ่านระบบออนไลนนั้น
ท่านเองก็สามารถเข้าถึง การลงทุนได้ง่าย และสะดวกสบาย มากยิ่งขึ้นอีกทั้ง ท่านเองก็ยัง สามารถประหยัดค่าใช้จ่าย ที่สิ้นเปลืองเหล่านี้ ไว้สำหรับเป็น เงินในการลงทุน เดิมพันออนไลน์ ได้เป็นอย่างดีมากที่สุด อีกด้วยนั่นเอง ที่บอกเลยว่า เป็นอีกหนึ่งช่องทาง การให้บริการ คาสิโนออนไลน์ ที่ได้รับการพูดถึง จากเหล่าเซียนพนัน ทั้งหลายเป็นอย่างมากที่สุด ที่เป็นอีกหนึ่งตัวเลือก สำหรับการลงทุน ที่ได้รับความสนใจ เป็นอย่างมากด้วยนั่นเอง
โดยที่ช่องทางสำหรับ พนันออนไลน์ ท่านเองนั้น ก็สามารถเข้าถึง การลงทุนได้อย่างง่าย และสะดวกสบายเป็นอย่างมากที่่สุด โดยช่องทางการให้บริการนั้น ท่านเองก็สามารถเข้าถึง การลงทุนได้ผ่านทางเว็บไซต์ เว็บพนันออนไลน์ ที่ท่านเองนั้น ก็สามารถเลือกเข้าใช้งาน ได้อย่างสะดวกสบาย เป็นอย่างมากนั่นเอง โดยที่เป็นอีกหนึ่งทางเลือก สำหรับการลงทุน ที่สร้างความสะดวกสบาย เป็นอย่างมากอีกด้วย
โดยที่ท่านเองนั้น ก็ไม่ต้องออกไปไหน ก็สามารถเลือกทำการลงทุน พนันออนไลน์ ได้จากที่บ้าน หรือสถานที่ต่าง ๆ ตามความถนัดของท่านเอง ได้เป็นอย่างดี เป็นอย่างมากอีกด้วย ที่บอกได้เลยว่า เป็นอีกหนึ่งรูปแบบการให้บริการ เว็บคาสิโนออนไลน์ ที่ได้รับความสนใจ จากผู้ใช้งานทั้งหลาย เป็นอยา่งมากอีกด้วยนั่นเอง
เกี่ยวกับเรา